Achievements Screen
This is the place in the Developer Portal for setting up and managing achievements implemented with the GOG GALAXY SDK in your game. You can add new achievements and their icons or edit/remove existing ones. It is also possible to upload a VDF file imported from Steam, as well as define different achievement names and descriptions based on a chosen game language (localization) or set all achievements as visible or not.
Adding a New Achievement
To add a new achievement:
-
Click the green Add new button.
-
In the resulting New Achievement window, fill in the following fields:
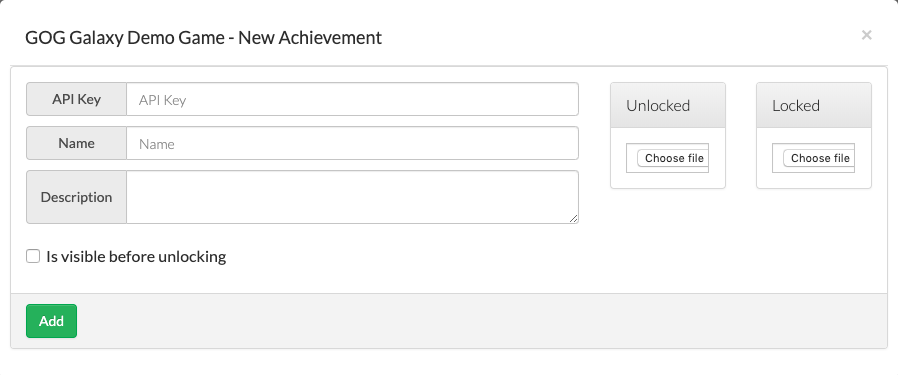
- API Key — a unique key used in the source code of your game; please note that it shouldn’t contain any special characters except dots (.) and underscores (_)
- Name — the name of the achievement
- Description — a short explanation of what this achievement means.
-
Choose and upload icon files for both the locked and the unlocked versions of an achievement:
- allowed image types: JPEG, PNG (lossless PNG recommended)
- minimum resolution: 60 x 60 px (240 x 240 px recommended)
- maximum size: 2 MB
-
Decide on whether this achievement should or should not be visible before unlocking by checking the Is visible before unlocking box.
-
Click the green Add button.
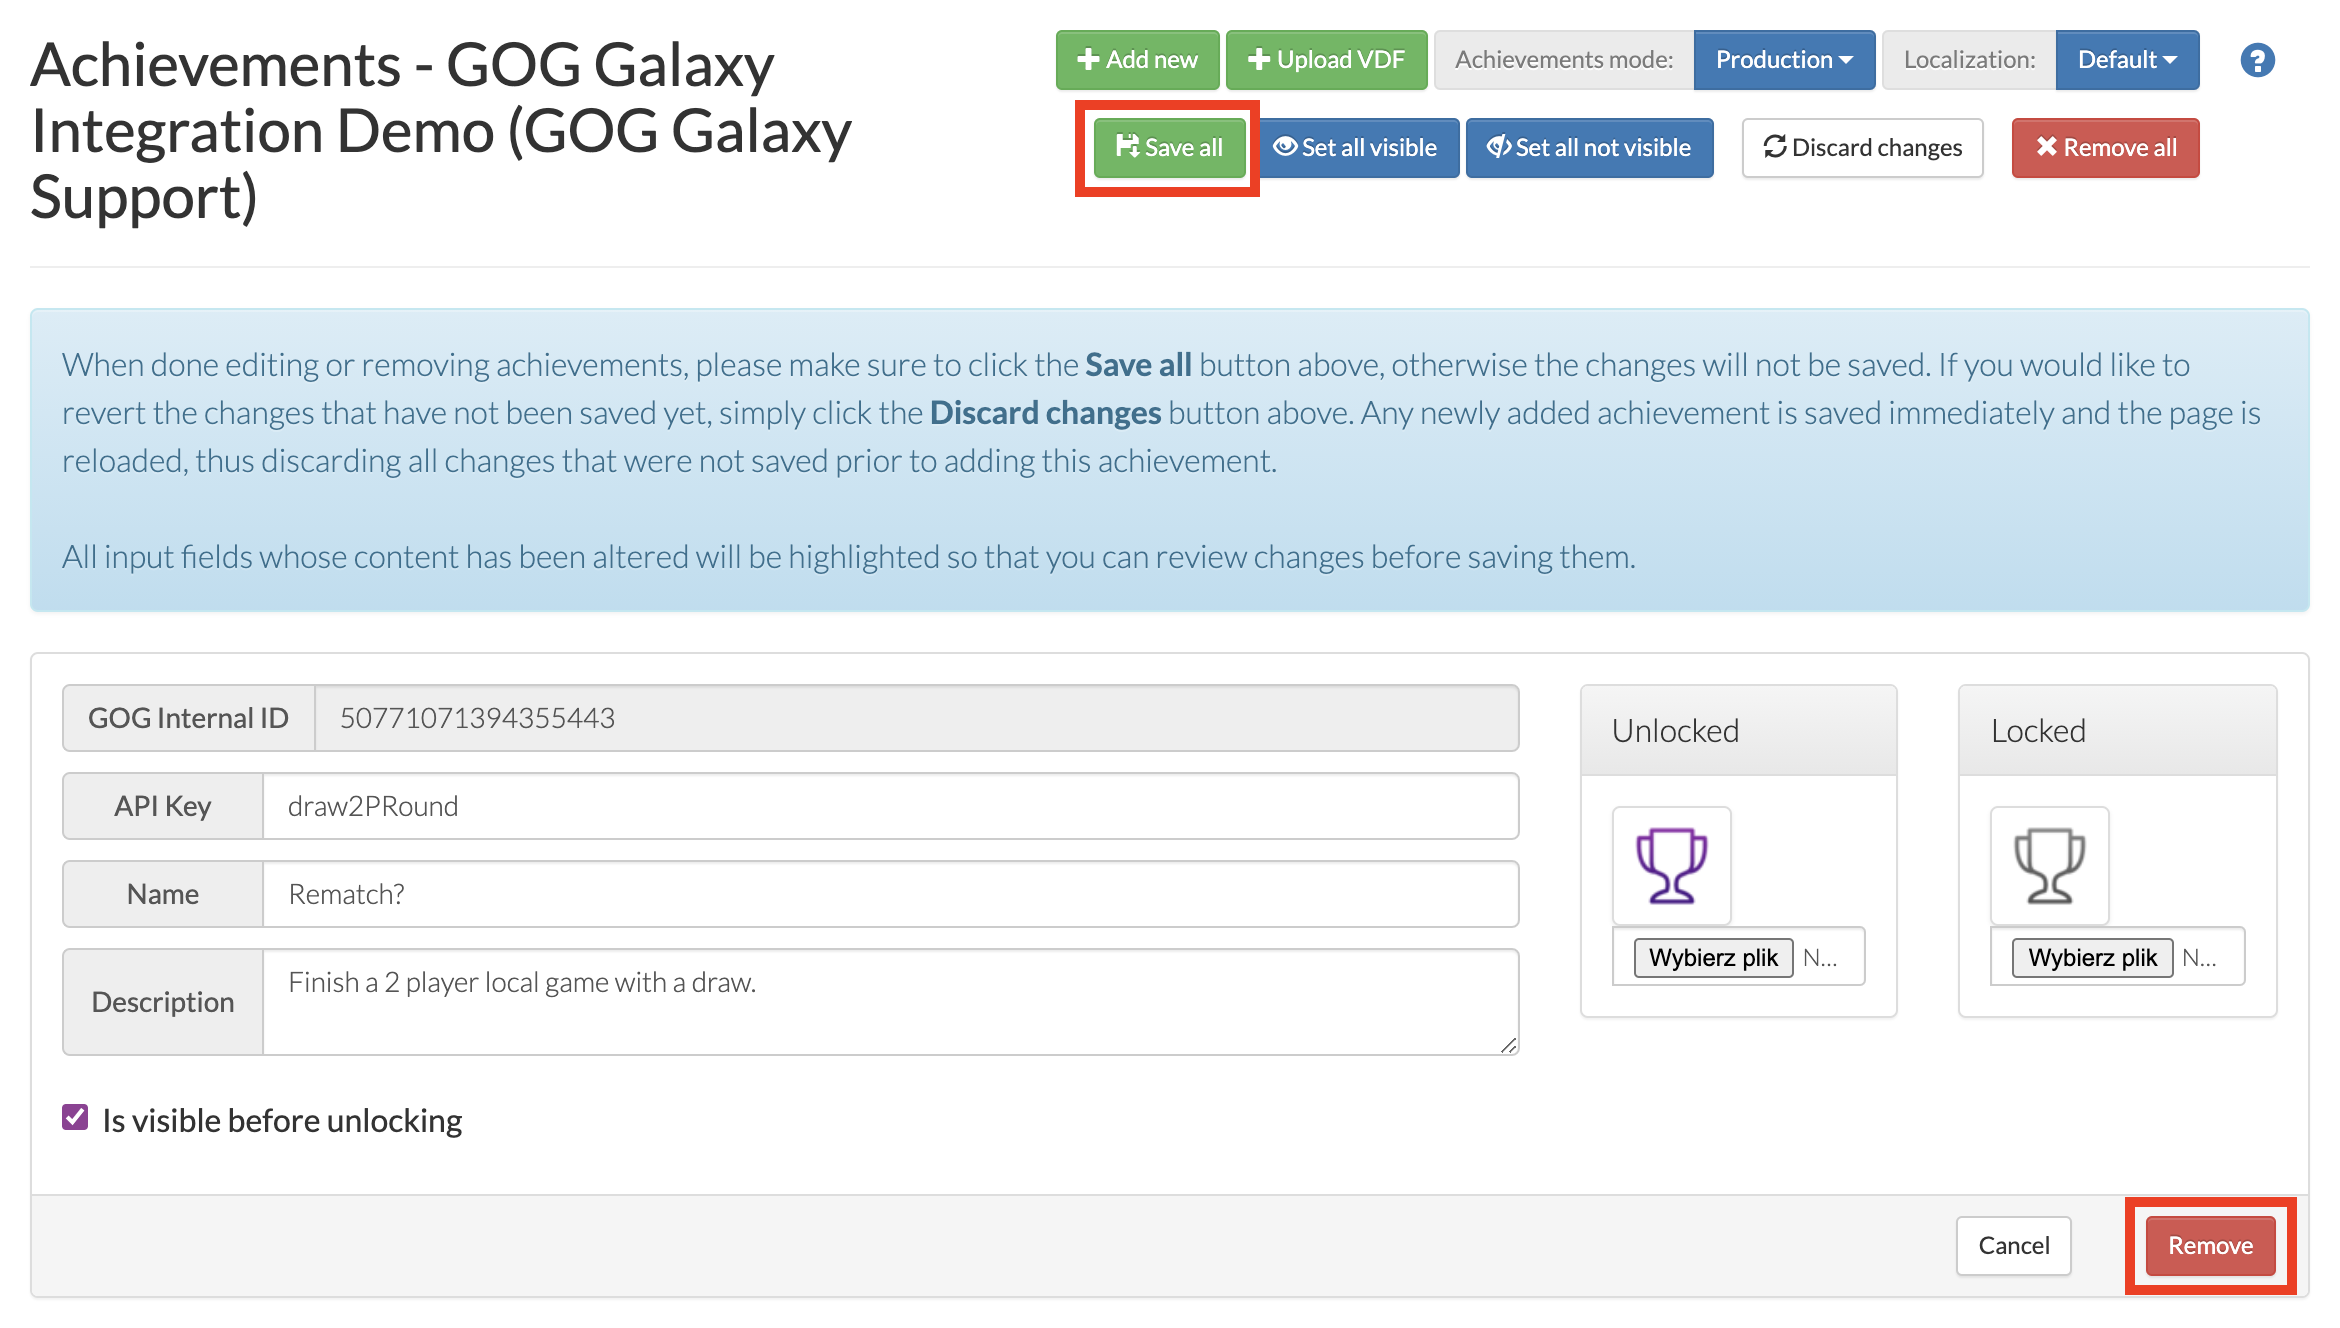
Save Changes Before Adding a New Achievement
Any newly added achievement is saved immediately and the page is reloaded, thus discarding all changes that were not saved with the green Save All button prior to adding this achievement.
Editing an Existing Achievement
It’s done exactly as with adding a new achievement, only without steps #1 and #5, obviously.
Removing an Achievement
After you have deleted an achievement by clicking the red Remove button and confirming the operation, please make sure to click the green Save All button to implement the removal. Otherwise, the deleted achievement will be restored with the next page refresh.
Adding Achievements Imported From Steam
To add achievements imported from Steam:
-
Import a VDF file as described in Importing Achievements Using the Steam VDF File.
-
On the Achievements screen of Developer Portal, click the green Upload VDF button.
-
In the resulting Upload Achievements window, select your VDF file and decide on how the imported list should be processed:
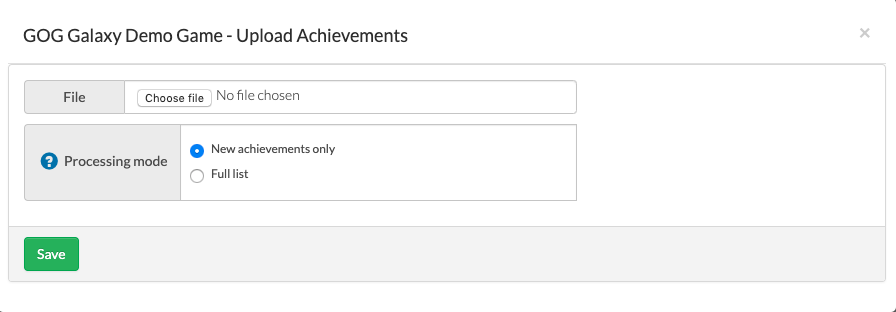
- New achievements only — only the achievements that are present in the VDF file, but not in GOG GALAXY, will be created
- Full list — besides creating new achievements, the whole list will be processed, updating the existing items and deleting the ones not present in the VDF file.
-
Click the green Save button.
Potential Conflicts in Released Builds
When importing achievements from a VDF file to an already released game, please bear in mind that:
- localized versions of achievements which are absent in the VDF file will be deleted from the DevPortal,
- all unlocked achievements will be replaced with the ones from the file. As a result, current stats will also be affected.
Setting Achievements Mode
Achievements can be available in two modes: Production or Development. The chosen mode affects how locked achievements are displayed to players in the GOG GALAXY client:
- Production — all visible achievements are shown
- Development — users can see only achievements they’ve already unlocked.
To set a mode, just click the blue button next to Achievements Mode and select the desired mode:

Setting Localized Versions of Achievements
If you want to provide localized names and descriptions for achievements in your game, you can do it here:
-
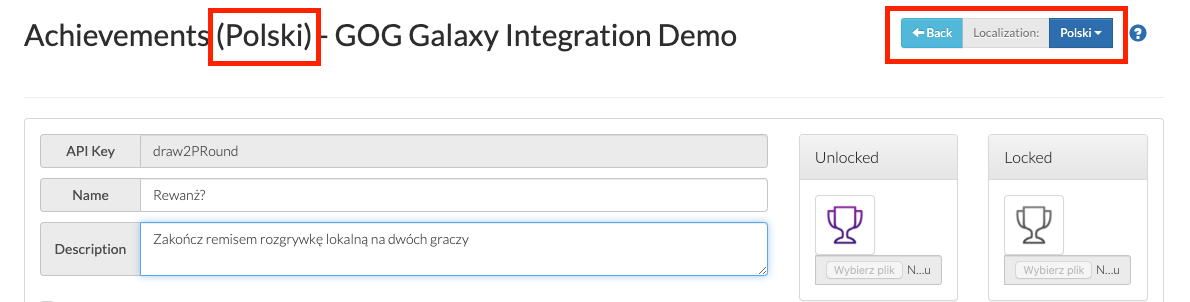
Click the blue button next to Localization (labelled Default by default 😉).
-
Select the desired language from a drop-down list of languages supported by GOG GALAXY. The page title will change to reflect the chosen language:
-
Enter the localized version of a name and description for a particular achievements (all other fields and options are unavailable for editing).
-
Make sure to click the blue Save button for each localized achievement.
-
If you want to create more localizations, just repeat the above steps. When you’re done, click the blue Back button at the top of the screen to return to the main Achievements screen.